
PB Pro Mini

No, it isn't Lead, nor is it Peanut Butter.  It is the 'B' version of the prolific ATmega328P microcontroller which started all this maker craziness off!
Top view of PB Pro Mini

Description

This is a minimal microcontroller board with only a voltage reg, crystal, I2C pull-ups, LEDs and the chip itself.  The goal here is to reduce costs while hosting the beefy 328PB!

This is based on, and pin compatible with, the Arduino Pro Mini 5v/16MHz from Sparkfun.

Notable, not-so-minor improvements for the 'B' version:
  • 2 UARTs
  • 2 I2Cs (TWI)
  • 2 SPI
  • Qtouch
  • 5 Timers (with OC, IC, and PWM)
Everything else is about the same.  You should be aware the clock driver on the chip is a low-power version, but this board and crystal operate at 16MHz just fine at 5V.  The Arduino library I've been using for the PB has been working without a problem!

Getting Started

You'll need a FTDI Friend or FTDI Cable to program this as there is no secondary USB chip, like on the Arduino Uno. You'll also need the Arduino libraries to support this new micro (see my blog post), or go directly to Watterott's GitHub.

Downloads & Links


Bottom view of PB Pro Mini

Purchase

If you send me $10 and an address via PayPal, I'll send you one (5V, 16MHz).  Of course it'll be hand soldered!  Lower US states only, unless you send me extra for international shipping.

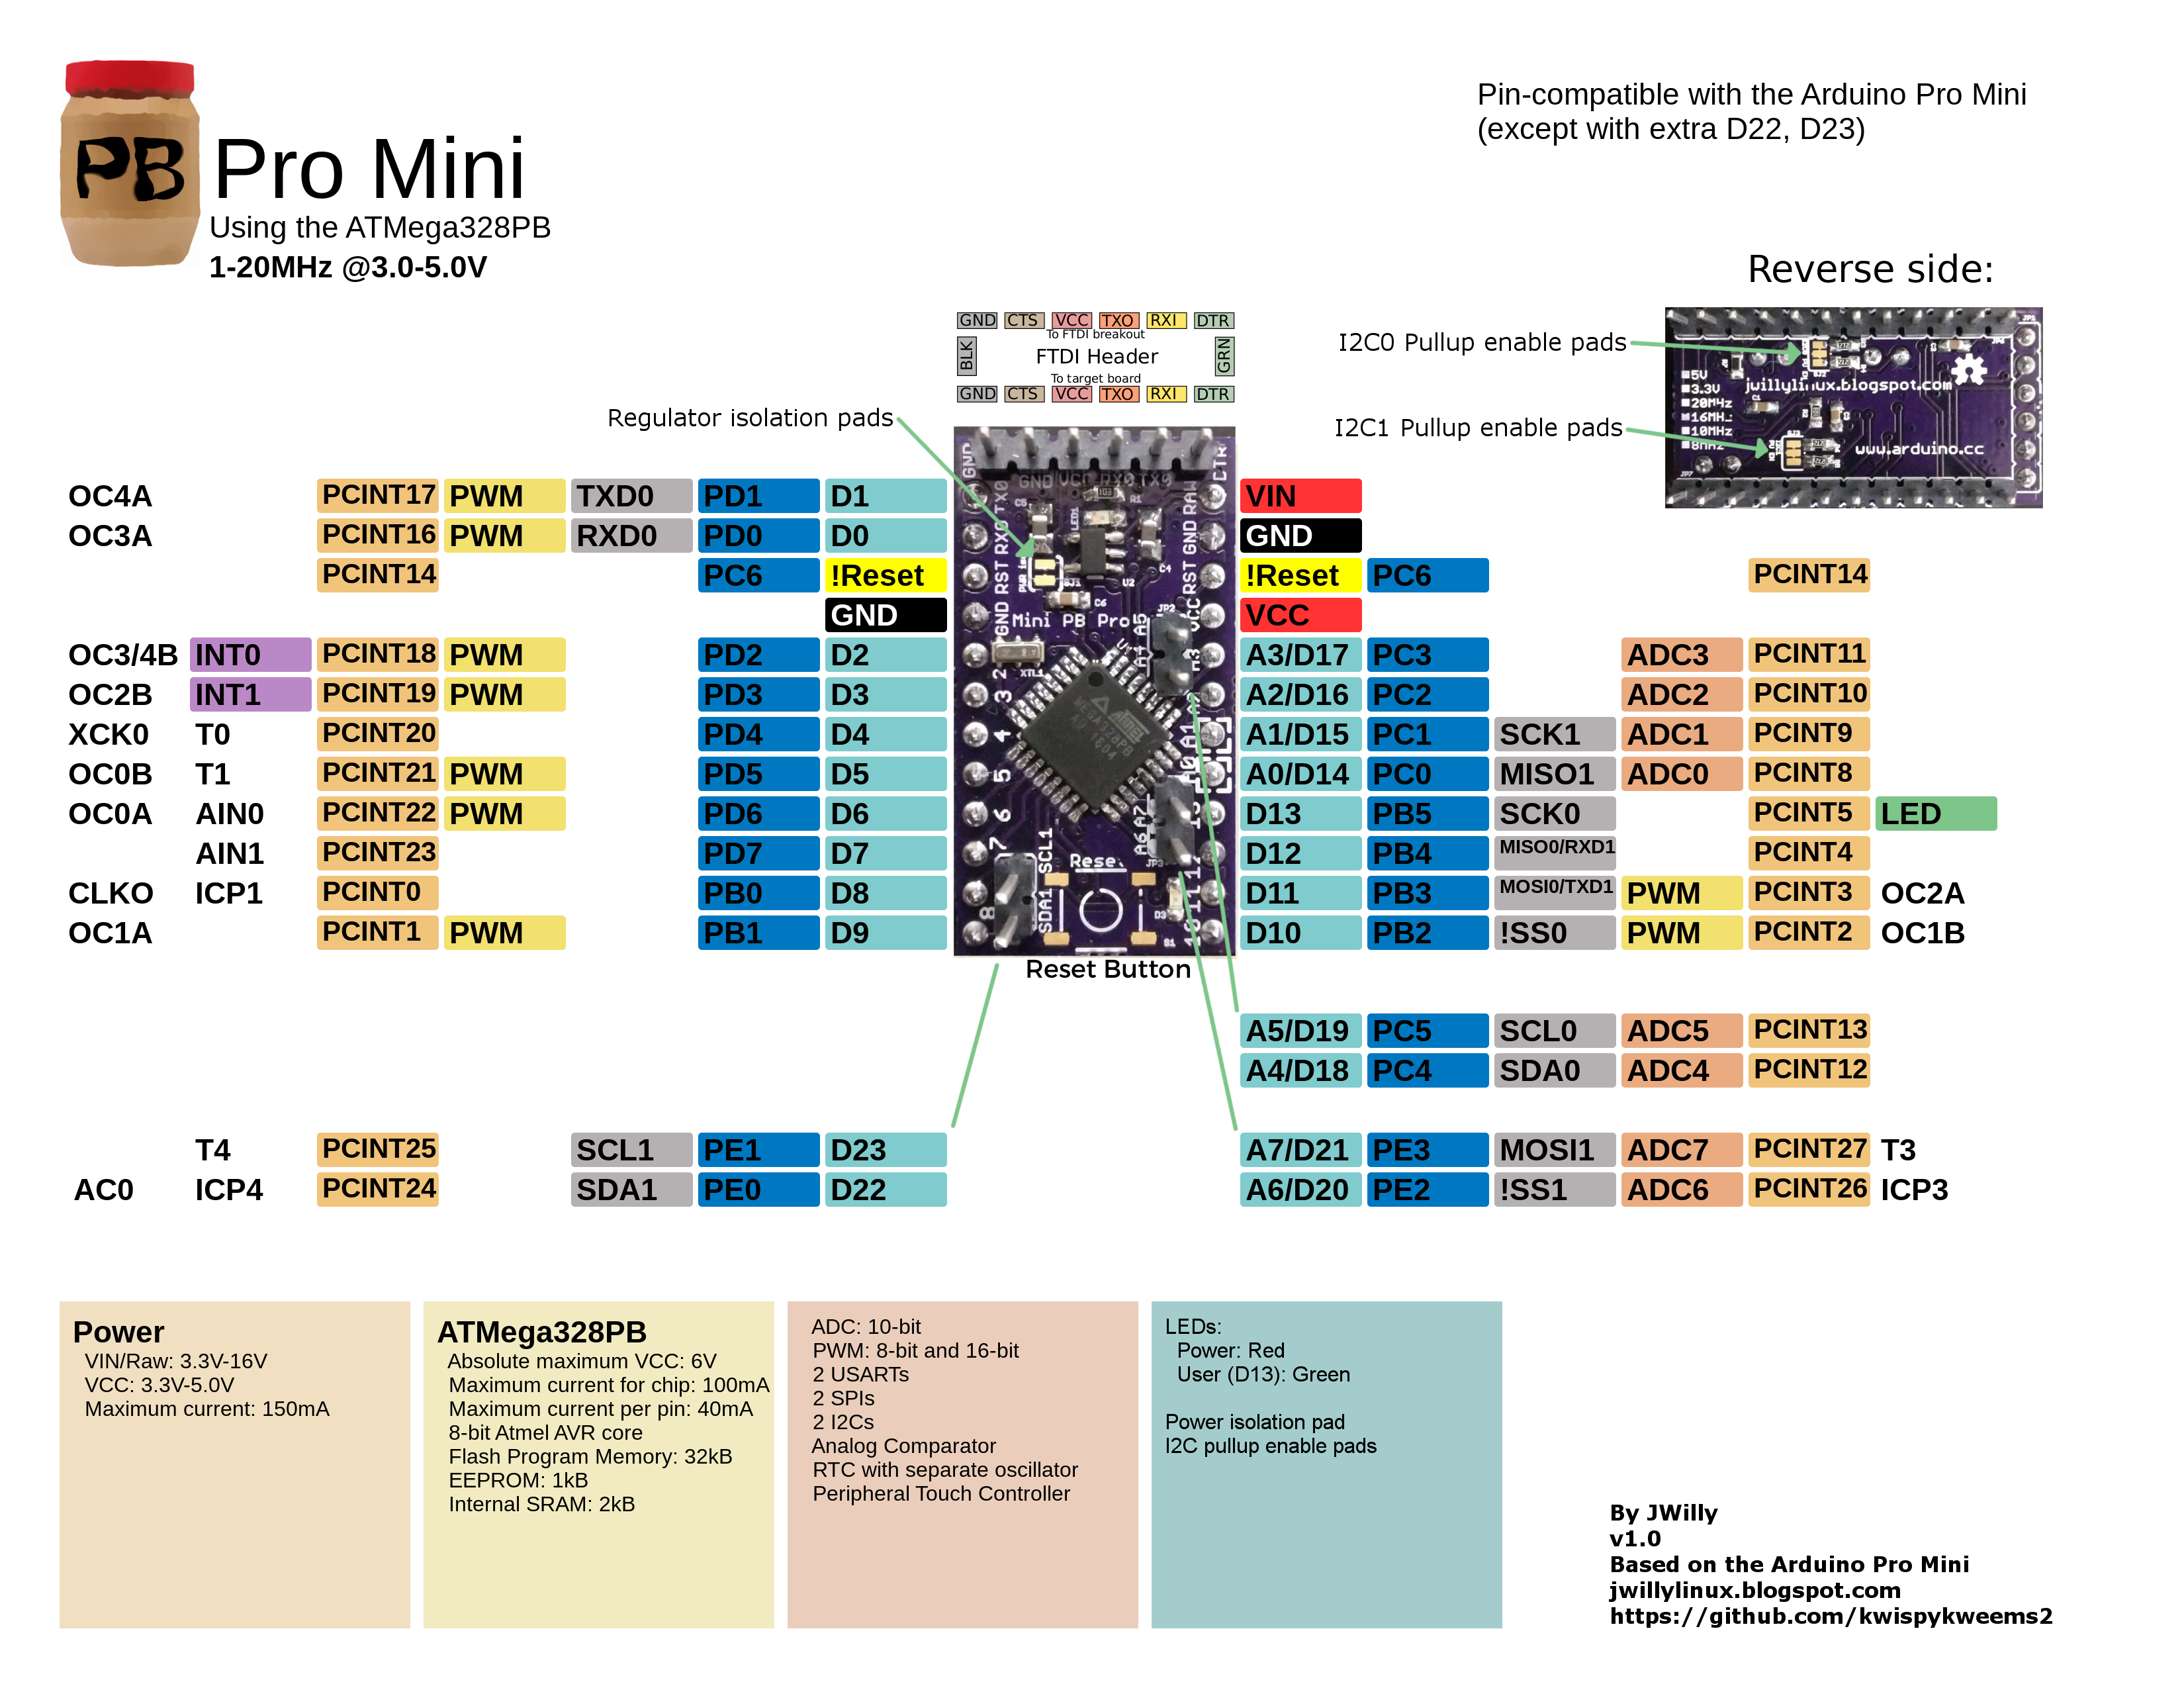
Pinout Diagram


~JWilly

Comments

Popular posts from this blog

Update to USBmicroISP: 6pin and 10pin headers

Actually using my USBmicroISP with microcontrollers other than Arduino Uno's led me to fix a udev rule issue with my Gentoo Linux laptop.  I was getting Permission Denied when I was trying to use avrdude as a normal user.  Yes, my user is part of the 'uucp' group... Background Some background on the Arduino ISP connector.  It is much different than the 10-pin AVR connector... 6-pin ICSP cable pinout.  NOTE: Numbers refer to ATtiny45/85 pins, not ICSP! Arduino ISP pinout. Notice the vertical line next to pin 1, which appears in silkscreen on the PCBs. Redboard ISP pinout.  Obviously the same as UNO.  Notice pin 1 location on upper-left, with horizontal white silk. My USBmicroISP has the cables coming off the IDC differently, but the key is in the correct orientation to the pinout in the top picture! (Please disregard numbering on first picture for ICSP purposes)  Usually the key and wires are facing inward (left side on 2nd and 3rd ...

Harvey Barnstead SterileMax Retrofit

I recently did up a replacement controller PCB for a customer who was having runtime issues.  The replacement PCB and firmware exactly replaces the old 68k controller system.  It is a drop-in replacement with exactly compatible connectors, power supply, and input and output signalling. The SterileMax was a prolific autoclave, and can economically fulfill your needs. If you have this version or similar, you can use my replacement. The replacement PCB is MUCH smaller than the OEM. Replacement controller for the PC1277X1, top-side. The PCB is about 1/3 the size of the original.  It helps to not use any DIP parts. Schematic for the controller. If you're interested in this design or a slightly modified version for your sterilizer, comment below and I can hook you up. The main issue this solved was over-pressure in the chamber during a run.  The NVSRAM's battery died and it lost all the configuration data.  Once this happened the system w...